Setup your signature in Outlook
Headjam will have supplied you with a Word document (.DOCX) file for your signature. You will need this downloaded somewhere you'll remember on your computer - we will need it for Step Two.
Step One
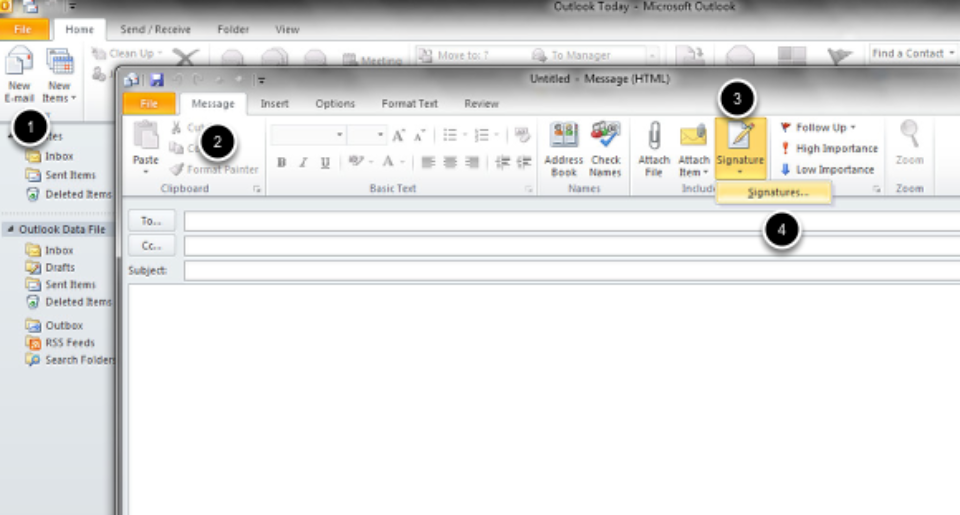
Begin by opening Microsoft Outlook
- On the Home tab, click New E-mail
- Click the Message tab
- Click Signature - sometimes you may just see the icon.
- On the Signature tab click Signatures...
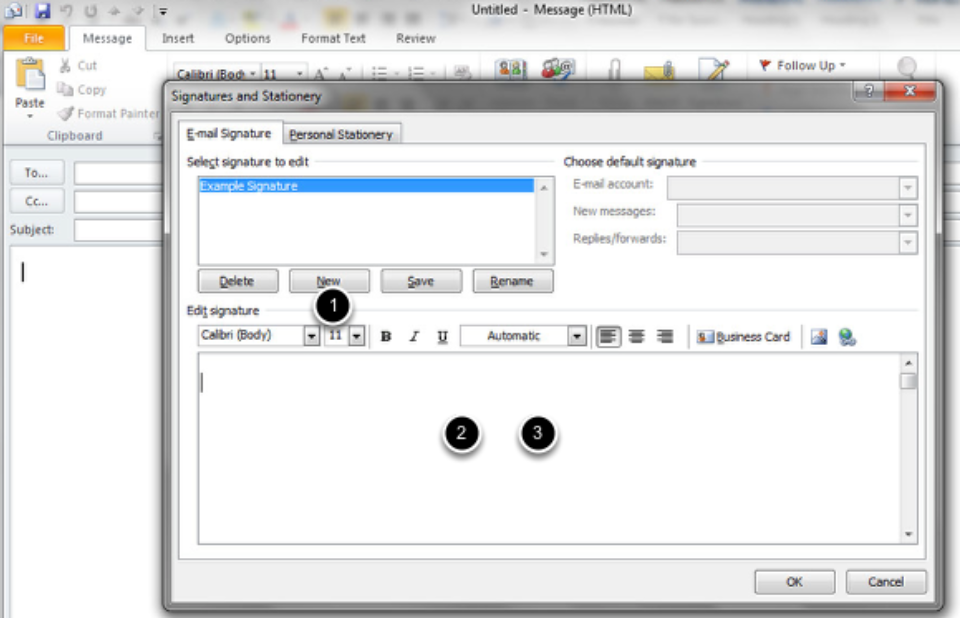
A window should appear - if you have any existing signatures they will appear here. Otherwise, it will be empty.
Step Two
- We have supplied you with a Word document. Open this by double clicking on the file - it should open in Microsoft Word.
- Once opened, go to Edit > Select All
- Go to Edit > Copy
Step Three
Go back to your email signature set up in Microsoft Outlook
- Click the New button - a text box will appear in the menu, allowing you to input the name of the signature. In this example we've called it "Example Signature".
- Click in the Signature box and delete any content that may already appear there.
- Press CTRL+V to paste - this will paste in the content you copied from the Word document in Step Two.
Step Four
Headjam have supplied you with a generic signature; now it is set up in Microsoft Outlook you can customise it to your own name, job title, mobile number etc.
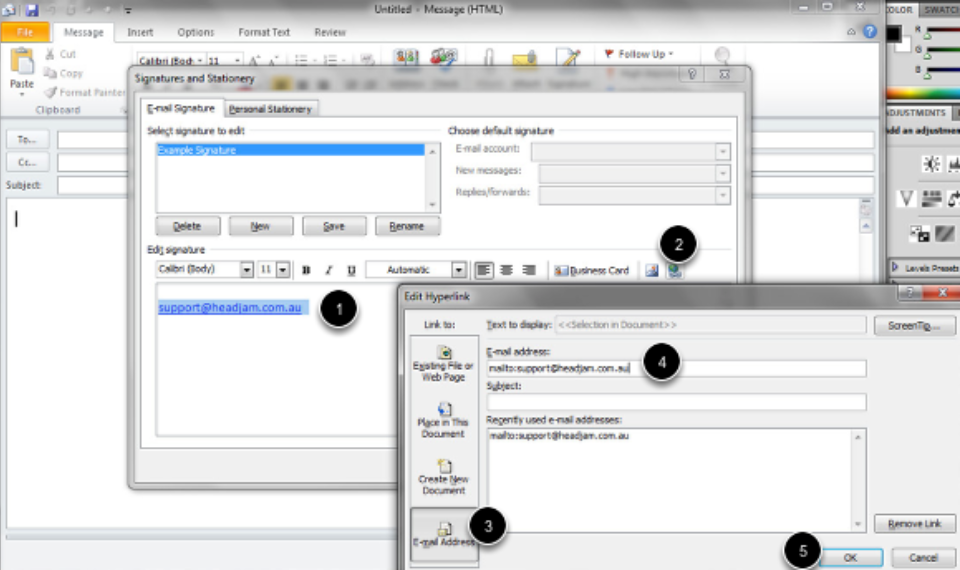
Please note: hyperlinks should be double-checked to make sure they're linking to the right place. This is especially true of email address links. To do this:
- Select the text you wish to link from - in this example, we're using "[email protected]"
- Click the Hyperlink button.
- Click "E-mail Address" if you're linking to an email - otherwise leave as "Existing File or Web Page".
- In "E-Mail Address", add your email - be sure not to delete the "mailto:" as that bit is essential!
- Click OK
We suggest sending a test email to another staff member or to Headjam to test all links are working and the formatting remains the same as what was supplied.